
Categories
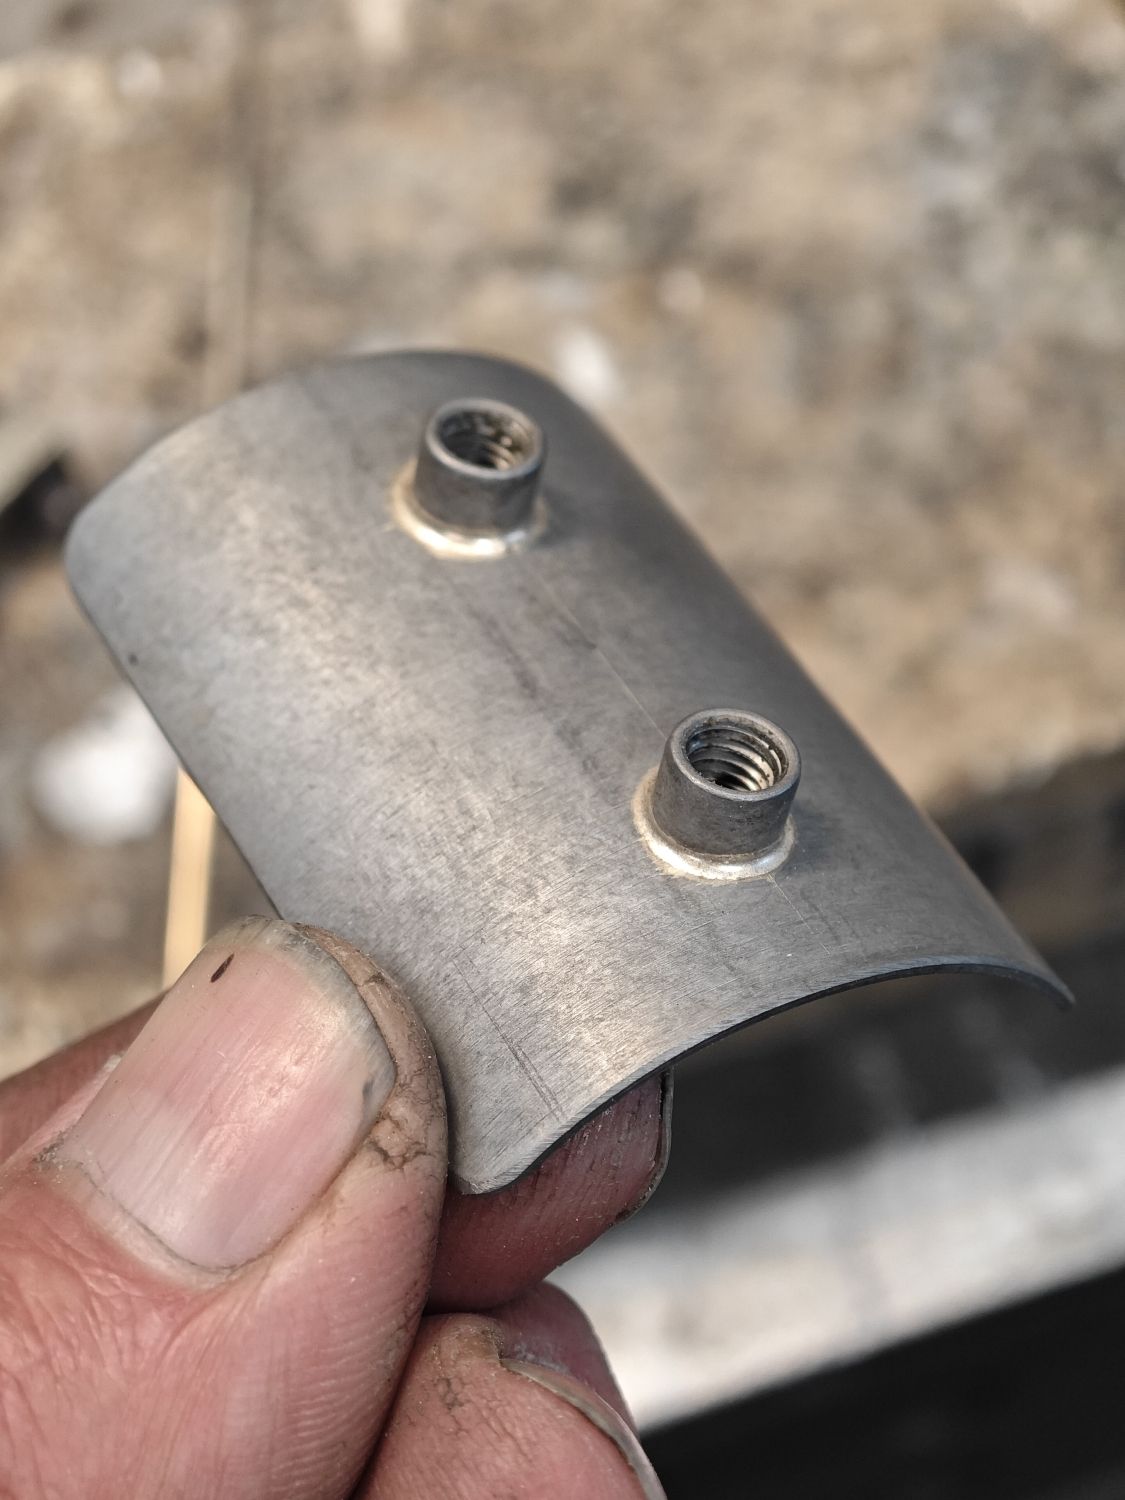
Eerder 'Headtube Fixer' rivnuts replacement part for G line
€28.00
New product!
extra
In stock: 3 available
1
Save this product for later
Eerder 'Headtube Fixer' rivnuts replacement part for G line
Product Details
Eerder metaal Rivnuts replacement part for G line.
On the G line, the front carrier block is bolted to two so called Rivnuts short for 'blind rivet nuts' (blindklinkmoeren in Dutch) . These rivnuts are installed by Brompton using a special tool for this task. These M5 threaded nuts are blind riveted into 7mm holes at the front of the headtube 26mm apart. 'blind' because the deformation is on the inside so not visible. On the inside the top rivnut doubles as a stop for the steering limiter which is clamped on the fork steerer tube. And that's where the trouble starts. Due to the folding process - and even during the initial transport from the factory to the dealer - the blind rivet nut is repeatedly subjected to an impact and eventually works itself loose. As a result, the front carrier block is not as secure as it should be; over time, it may even become looser due to more impacts on the inside and pulling forces from the outside. Riding off road with the Gravel line makes it even worse as you can imagine. I've even seen cracks developing from both holes outward and bulging of the area around the holes.
Installing the replacement part:
Installing this part takes a bit of time and requires some basic bicycle tech know how. How hard can it be you might think... So here we go...Take off the handlebar stem with a 4mm hex key. 4 bolts on the outside and another one on the inside (open the hinge) which is used for adding a bit of pre tension on the headset bearings. Take out the fork by first removing the top cap and the conical compression ring. Remove the steering lock limiter as it doesn't work well with the original rivnuts removed and you most likely never notice the difference during folding. (it's just a bad design anyway) Remove the front carrier block. When one of the bolts keeps on spinning without much effect (generally the top one) tilt the Front carrier block sideways to put some tension on the spinning rivnut. Or simply use a needle nose plier to hold the rivnut on the inside of the headtube. Then remove the rivnuts by carefully drilling the head/flange off with a 7mm drill bit. The holes in the headtube are 7mm as well so it has to be a 7mm drill bit. While you're at it you can drill the holes of the black plastic 'diameter conversion piece' a little bigger. This is the part which is mounted at the base of the plastic G line front carrier block. Drill these holes +/- 4mm deep with the 7mm drill bit (not all the way through!) As the Headtube Fixer protrudes 3mm through the headtube (a little less for the later G lines with a thicker headtube) you need at least two 3mm deep recesses in the back side of this conversion part. See the last three pics above.
Now put the replacement part in. You can add a drop of superglue in the middle so it doesn't fall out while working on it. Or even fully glue the part to the inside with Epoxy glue if you want to go all the way. With the front carrier block installed the replacement part is fixed and you can put the fork back in, add a bit of pre tension to the bearings. Fasten just one of the 4 bolts finger tight so you can still put the bars straight with the bike on the ground. When fully convinced it's straight you can tighten all of the 4 clamp bolts bit by bit to the desired torque. Check for play or binding of the headset. It should turn freely without binding and the wheel should fall to one side when the bike is angled a bit in the air.
When removing the Front carrier Block for some reason you better replace one of the two bolts for a headless bolt, threaded rod, so the replacement part doesn't fall inside the headtube cavity. Not needed when you applied a good amount of glue. However with just a drop of superglue it's adviseable to be careful during disassembly if you don't use the threaded rod...
Material: Chromoly steel grey phospated for a moderate rust protection (if you're afraid it will eventually gets rusty apply some bearing grease or linseed oil, Tectyl, Hollow section wax or something similar)
Weight: 18 g
More photos of the production and installation and so on can be found in the dedicated Instagram folder: G line headtube
Display prices in:EUR
